Showing posts with label Alton Brown. Show all posts

Saturday, December 3, 2011

Pepper Jack Mac

A word of warning before we begin:  Consuming a generous helping of Pepper Jack Mac can induce feelings of Euphoria after the fact.  This one was baked up in a nice Emile Hendry Burgundy-clay pie plate, preheated in a 400 degree oven.


So what is Pepper Jack Mac?  It's Mac-N-Cheese made with Habanero pepper Jack cheese rather than cheddar.  Vermont Sharp Cheddar is the type Thomas Jefferson (a Libra) chose to make his famous american original.  It's very nice, but not particularly sharp.  A great deal of flavor can be injected by selecting Habanero Pepper Jack cheese over cheddar.  You might try them in a 50/50 combo blend to see if you like it.

I do not recommend Jalapeño Jack because the Jalapeño has a nasty, bitter flavor.  The pain you experience eating a Jalapeño does not come from any capsaicin burn.  Rather, it is your taste-buds rejecting that acrid and bitter flavor that is very unnatural on the pallet.

Contrary to some popular opinion, the Jalapeño is not a hot pepper.  It scores only a 1,000 on the Scoville rating system.  The Habenero is 10x hotter, scoring a 10,000, and it is still not that hot.  The notorious Ghost Chili (Bhut Jolokia) is a really hot pepper.  It scores 1,000,000 (one million) on the Scoville scale.  The Jalapeño also suffers greatly from quality control issues.  Some have no flavor at all.  Some will blow your mouth out, and not in a good way.  Avoid the Jalapeño.  It's fairly worthless and useless.

No friends, the Habanero is the real chili pepper.  It has a very nice and sweet flavor after a decent capsaicin burn.  This is the chili as mother nature intended.  That is why this pepper is the foundation of the entire Jamaican culinary tradition.  Incidentally, Jerk Chicken and Pepper Pot are absolutely delicious.  If you haven't tried them, you are truly missing out on the finest thing in life.

Habanero Jack Cheese is outstanding in every respect.  It has enough sting to make it interesting, but the milk protein and fat both cut the effect down so that anyone can enjoy the sweet tangy flavor the Habenero injects into (what is otherwise) a very dull cheese.

Baking this cheese into a Mac-N-Cheese, concentrates all these flavors by removing water, carmelizing,  and adding salt to the equation.  What you get is a pretty powerful culinary experience.  We're talking about flavors that explode in your mouth.  It's a big-bang experience, and not in a bad way.  It also leaves you with a very nice after-glow.

Biologists who have studied why humans seem to like capsaicin-tinged foods have come to the conclusion that capsaicin stimulates the pleasure regions of the Limbic system.  Eat enough capsaicin, and you will encounter feelings of euphoria not unlike those experienced after a tremendous workout.   These feelings are usually encountered no more than 15-20 minutes later.  The net effect is that we walk away from the table with a feeling we had a heck of a meal.

The recipe I used was essentially the one Alton Brown cooked up in "For Whom the Cheese Melts II".  This  was the episode where he taught little Alton how to make a Mac-N-Cheese.  You can see it here:


I made a few simple modifications.  The recipe is simple:

  • 1 ounce flour
  • 1 ounce butter
  • 16 ounces of heavy cream
  • 8 ounces skim milk
  • 8 ounces Habanero Pepper Jack
  • 8 ounces Super-Sharp Cheddar
  • 2 ounces Panko bread crumbs
  • table spoon dry mustard powder
  • half-teaspoon paprika
  • 4 ounces diced onions
  • 1 bay leaf
  • salt
  • pepper
  • 1 stick of Rosemary
  • 3 twigs of thyme
  • 2 eggs
The prep and cooking technique was the same.  I used fresh herbs in this case, and they brought a ton of flavor to the party.  This one really popped.


The worst aspect of the entire procedure is grinding the cheese, but this need not be an issue if you have a decent food processor.  I have one of the best, and it made very short work out of 16 ounces of cheese.  Two grinds and I was done.


Saturday, March 5, 2011

So I took my first swing at Mole Negro tonight


And I don't know whether it worked or not. I will find out tomorrow.

For those who do not know, the word Mole is Spanish for sauce. It could be any sort of sauce, including a French-style pan sauce with cream. The term mole does not necessarily imply chocolate. We use term very loosely here in the USA. We think it referrers exclusively to the chocolate sauce that drives people bad-shit crazy. Mole Negro is the correct name for the world-famous chocolate sauce that Mexicans use to add much0-mando savory flavors to their meats. It might be any type of meat.

Mole Negro is considered a world-class piece of cuisine, and it is one of the most complex things you can try to cook. Take it from me, I just took a swing at a simple version of Mole Negro this evening. It was a project. There are a lot of ingredients. Further, these are not the sort of things a western-style cook has in his pantry. You have to go looking for some rare materials. Further, those materials have to be organized into sub-components, and assembled correctly... or you blew it.

The most interesting feature in my view was the way in which you counter the bitterness of the dark Mexican chocolate with the acid and sweetness of lime juice and lime zest. Further, there is an interesting balance of hot spicy chillies and sweet raisins and raw cane sugar. Hot and sweet. Ph factor 7 when you balance chocolate and lime. This is a very strange sauce.

My product had a very interesting flavor. I just don't have the slightest idea whether that flavor tastes like Mole Negro. I also wonder how things will turn out when I use this sauce tomorrow in it's final application.

What is that final application, you ask? I am finally going to make the Chili con Carne I have been craving. I am soaking the beans now. My frige is loaded with short ribs, pork spare ribs, and lamb shoulder steak. Tomorrow, I will rub these meats with a custom chili powder I got from Alton Brown, toss them on the barbecue to brown up, and then I will braise them in a pressure cooker for some 25 minutes using that mole sauce as the braising liquid.

Let's hope it turns out great. I won't know whether it is good bad or indifferent until the final chili con carne is sampled.

Of course, I won't be able to each much of this myself, but what are friends for anyhow?

Thursday, August 12, 2010

98321


998321 is the formula for super-premium ice cream... at least the base of super-premium ice cream. This according to Alton Brown, in his now famous Churn Baby Churn II episode of Good Eats. The Food Network first aired this episode some two years ago, so this is not new information, but it is new to me.

Just what the hell does 98321 mean?

  • 9 ounces of sugar by weight. Preferably vanilla sugar. More on this later.
  • 8 egg yolks, separated from their whites, naturally.
  • 3 cups of half & half
  • 2 teaspoons of vanilla extract
  • 1 cup of heavy whipping cream
I would add to that a shake or two of sea salt and a couple of grinds of white pepper. I also chopped half a vanilla bean, gutted it, and tossed it in.

Last night I used this formula to brew up some super-premium chocolate ice cream for the first time. I think the results are going to be pretty spectacular. The process is fairly long, but extremely interesting.

I am not one for separating egg yolks, and have never really done it before in my cooking. I disdain recipes that call for this process. I think the egg is pretty well perfect as-is, and fucking around with it is usually outside the pale of any acceptable human conduct. Yet, the lure of super-premium chocolate ice cream was strong enough to bait me into this immoral conduct.

It turns out separating eggs and yolks is trivial. My first go at the shell method worked fine. The only minor problem was that I could only go from shell to shell about 4 times before the yolk would pop. No big deal, as the white had already been separated pretty well. Who cares if the yolk pops? You are going to whip it anyway?

I found the hand method is a heck of a lot better. More egg white comes off, and the yolk does not pop. Also, health advocates now say that using your hand--if it is even moderately washed--introduces less bacteria than going shell to shell. I found that surprising. Most great chefs will admit that they have seen this health-presentation more than once, but they dislike the notion of changing techniques.

Anyhow, it is the hand method for me.

Whipping the sugar into the yolk was a really interesting experience. I would have used my stand mixer, but it was dirty from the meat loaf I had just made. I did not want to risk that kind of cross-contamination, and I didn't want to wash the mixer bowl with bleach and reuse it immediately for ice cream. Therefore, I whipped it by hand with a nice whisk from Ikea. That was some work, but the results were pretty damn close to perfect. The custard gets incredibly thick. It is almost like wet concrete.


Now for the interesting part: Brewing the chocolate base.

I placed 8 ounces of half & half in my favorite 4.5 quart Le Creuset pot, and tossed in 2 ounces (by weight) of Hersey's dark chocolate powder. It turns out that chocolate powder has a low mass density, about half that of sugar. Two ounces by weight fills about half a cup of volume. I whisked that over low heat for about 6 or 7 minutes until it turned smooth. Then I began slowly adding the rest of the half & half and heavy cream. Once all that was mixed in smoothly, I raised the temperature to 170F. I confirmed that temp with two different thermometers.

I took the pot off the stove, moved it next to my big (8 cup) measuring cup containing the custard (sugar and yolk). I began ladling in the chocolate cream into the custard slowly whisking it pretty hard. The concrete loosened up pretty quick. Before you knew it, I had the whole thing mixed smooth. I took that big measuring cup of chocolate custard, and poured it right back into the Le Creuset pot.

The pot went back on top of the stove where I heated it again to 170 F. I whisked hard the entire time. There were little problems as bits of skin did form on the base of the pot. Overall, there was no real problem. It was during this heating that I threw in the vanilla bean, the salt and the fresh ground white pepper corns. I have a nice Vic Firth grinder for this purpose

I used to use Vic Firth drum sticks when I was a kid playing the drums. Now I have Vic Firth maple rolling pins, cutting boards, and pepper grinders.

After the mixture reached 170F, it went right back into the 2 quart measuring cup. My nice rubber seal went over the top of the 2 quart measuring cup, and it went into the frige over-night. Of course, there was chocolate ice cream batter residue on my Le Creuset pot. I had to clean it some out.

I got to lick the pot, with the help of my fingers. It was good. Damn good. I could tell already that this was going to be one hell of an ice cream.

This morning, I churned the mixture before going to work. That was some of the hardest and firmest soft-serve I have ever seen. Just about all of it went into a nice rubber-made container and into the freezer. Of course, there was soft-serve ice cream residue lining my ice cream churn. I had to clean it out some how.

I got to lick the pot, with the help of a butter knife. Don't use your fingers. You will get frostbite. It was good. Damn good. It was already one hell of an ice cream. I wonder what it is going to taste like tonight, after it has hardened for about 9 hours?

Stunning stuff. I would like to invite Katy Perry over for a scoop of my ultra-premium Hersey's dark chocolate ice cream. Knowing the character of the Capricorn, she probably wouldn't leave the apartment for a week.

That would be just fine with me. I would not have a problem with that.

Saturday, July 31, 2010

I wonder what Alton would think of this?


So Shun has shocked the world by reinventing the hacksaw. I just got a piece of bacon in my mailbox from Williams-Sonoma indicating that Shun has introduced a new hacksaw called Edo Dual-Density 8 inch utility knife. You can read about it here.

For those of you who do not know, one of Shun's most vocal advocates is none other than Alton Brown. He holds a Shun in his hand and says "Happiness is a sharp knife." He admits to having had a very promiscuous and experimental background history with knives, but says he has settled down in to a monogamous relationship with Shun.


Alton also hates serrated blades of all strips and colors. He derides them as hacksaws. At least two ad-hoc YouTube.com videos show Alton going off, like a bomb, about the hateful, detestable, wretched, foul and malodorous nature of the hacksaw. If you haven't seen these videos, you missing some prime-time entertainment.

Alton speaks loudly, and caries some clout. He has damaged the market for serrated blades. The once popular items are now quite difficult to sell. People sneer at you in line, if you have the bad taste to carry them to the check out counter. It's only safe to order them by mail from amazon.com or Ronco.

I don't think Cutco has forgiven him, and I doubt they ever will. Even though they are famous for their straight edges, Cutco has a few good hacksaws, and they have a blade-protection scheme that looks similar to the hacksaw. They believe they have the best engineering designs on earth. They are quite pissed the culinary types are unwilling to give it a try. They reserve a large heaping helping of ire for Alton's campaign against the hacksaw.

I, personally, don't have anything against the hacksaw. It has it's purpose, moments, and uses. There is an application for this engineering concept. I don't want to cut bread without one. Beefy St. Louis Ribs have tough membranes that are tough to cut without a good hacksaw.

When I saw this piece of bacon from Williams-Sonoma, I let loose with a big belly laugh. Now doesn't Alton feel might damn betrayed about this, aye?

Thursday, July 22, 2010

Alton's Pilaf methodology works extremely well

So, I checked out an old episode of Good Eats, dating all the way back to Season 1, I believe. It was titled Pilaf to the People. You can see the condensed presentation right here.

So, I thought I knew a hell of a lot about rice, and I thought I had made Pilaf about a hundred thousand times. It turns out that I was not quite correct. Close, but no cigar. First the summary.

Pilaf is not a recipe. Pilaf is not a list of ingredients. It is a cooking methodology. Even though the word literally means "rice dish", it should mean, cooking method for rice. You can do a lot of different ingredients. Add a few, throw a few away, change these, bring in some others. This doesn't determine whether you have a Pilaf. The approach to heating defines Pilaf.

According to Alton, the cooking process runs through Seven simple stages.
  1. Sweat your vegetable soffritto in butter.
  2. Add the rice and sauté until you have a strong nutty aroma.
  3. Add the liquid--substantially less than normal for rice--stir it up, and discard your stirring spoon or utensil.
  4. Cover with a lid. Bolster the seal with a wet dish rag, which forms a gasket.
  5. Place in an oven at 350F degrees for 15 minutes.
  6. Remove and let it sit for 15 minutes.
  7. Pour the rice out on a serving dish. Flatter is better. Taller is worse.
Notice that this approach only presumes you have some aromatic vegetables, rice, butter and fluid. What those ingredients are is open to your own creative imagination. We are talking about approach to cooking, not a list of ingredients, per se. The absolute key is that you sauté first, use less water, and then finish in the oven. That is the definition of the Pilaf method: Sauté first, use less water, finish in the oven.

This doesn't mean everybody follows the rules or even knows what they are. Certainly, I was not aware of the rules as I broke them 300,000 times. I thought you simply sauté first, then cover and boil. I also used too much water.

Alton's approach was fascinating for several reasons.
  1. It seems to be the perfect case for a Lodge 5 quart cast iron Dutch oven.
  2. I have never seen anyone stick a dish rag in the oven.
  3. I recently had an experience with rice in a pressure cooker that suggested some cooking methods require less water.
  4. I have recently had many experiences with Paella which indicate that more water is necessary for this cooking method.
  5. The list of ingredients Alton used, including fruits and nuts was quite intriguing. This is a very interesting counter-point to Paella, which never includes any fruits or nuts.
  6. Another important difference between Paella and Pilaf is that Paella includes various types of meats. Pilaf does not include any meat. Pilaf is a side dish for meat.
So I chose the following list of ingredients.

Soffritto
  1. Carrot
  2. Celery
  3. Shallots
  4. Yellow bell pepper
  5. Red Bell pepper
  6. Garlic
  7. Ginger coins.
Ingredients
  1. 3 cups of Sona Massouri rice from India
  2. 18 oz of Chicken broth
  3. 12 oz of hot water
Spices
  1. 1 table spoon of Kosher salt
  2. 1 teaspoon of Turmeric
  3. couple of grinds of fresh cracked white pepper corns
  4. 1 ounce of California extra virgin olive oil
  5. 1 tablespoon butter.
  6. Way too damn much Spanish Saffron
The cooking approach was interesting.
  1. Place the dutch oven on the stove top and cranked up to high. This is only 8,000 btu on my stove, so don't be impressed by the heat.
  2. Drop my 1 teaspoon of turmeric on the dry iron and heat it up. This is what all the Indians do. You wake the turmeric by heating it on dry iron.
  3. Drop the butter on top of the turmeric and melt it. This forms a type of rue.
  4. Dropped the soffritto on into the rue of turmeric and butter.
  5. Sweat the vegetables.
  6. Drop in the rice, and stir. Continue until the rice begins to brown a bit, and you get a strong nutty aroma.
  7. I poured about 4 ounces of hot water into a ramekin, I tried to pull out a few threads and place them in the ramekin. A tumble weed of saffron fell in the ramekin. Lesson learned: extract your saffron with a pair of tweezers. Do it over a very dry surface. Let the saffron diffuse and turn the water golden yellow.
  8. Drop the Saffron water in the pot first. Rinse out the ramekin with the remaining water and chicken broth, as you pour them on the rice. Don't loose any saffron goodness.
  9. Stir it up, and discard your stirring utensil
  10. Wet down a dish rag.
  11. Place the rag over the mouth of the Dutch oven.
  12. Seal with the lid. Rotate the lid about 5 or 10 degrees to make sure you have a tight gasket.
  13. Place in the oven for 15 minutes.
  14. Remove and let it sit for 15 minutes.
  15. Dump it on a large serving tray, and spread it out.
  16. I added dried black currants (from my Spotted Dick episode) and Golden Raisins (Sultanas--also from the Spotted Dick episode). I mixed those in thoroughly.
  17. I drizzled with California Extra Virgin olive oil
  18. I sprinkled with a little Kosher Salt
  19. I cracked a little more white pepper over the top.
I was pissed off over the fact that I used too much saffron and forgot the bay leaves, and the pistachios, but the rest of the process was surprisingly golden for a first run. The results were not only edible, not only delicious, but damn near perfect. My guests were left wondering why I didn't consider this a perfect run. I have to say, I wondered to myself how bay leaf would improve the situation. I believe Pistachios would help. Nuts are great.

I have to say that the Sona Massouri rice was perfectly cooked. It was not to dry, not too wet, not sticky, not too soft, not too hard. It was perfectly done. Whilst I can tinker with the list of ingredients, the methodology is essentially perfect. No adjustments in the cooking process are necessary or beneficial.

I tinkered with the notion of sweating the vegetables in the oil, removing them, then sauté the rice in butter, put them back together and go. This would allow me to brown the rice a bit more. Still, I am not sure this would be a better approach. I am uncertain whether this would yield a better product.

It's hard to improve on Alton's method here. I highly recommend it.

Tuesday, July 13, 2010

My Favorite Chefs

One of the leading theories in pedagogy states that it doesn't mater so much the subject you are teaching so much as what and who your are being when you teach. The role model you present is more important than whatever trivia you are covering today.

A great science teacher presents a role model of how a scientific mind approaches a mysterious problem, devises a working hypothesis, and designs experiments to refute this hypothesis. In this way, you teach a kid how to do science, you don't tell him a story about science. A really crappy college political-firebrand presents a role model of how a really crappy college political-firebrand approaches a "problem", i.e. by screaming about it like a fool. In this way, you teach a kid how to scream like a fool. You don't tell him a story about screaming like a fool.

You teach the kid how to fish, you don't tell him a story about fishing trips.

So it is in cooking. It doesn't matter if one of the following five chefs is cooking some really nasty seafood with testicles, tentacles, claws, antennae, snails, clam shells and compound eyes floating around in the sewage. Although this is a dish I would never prepare myself, I can still watch anyway, because these 5 present a roll model showing how a great chef efficiently organizes the process of preparing complex dishes. Organization and fundamental technique in cooking is like blocking and tackling in football. Everything logically reduces to these two fundamentals.

Jacques Pépin


I love watching this guy work. He focuses a lot of fundamental techniques at the same time that he prepares some pretty sophisticated stuff.

He will go out of his way to show you how to properly crack an egg (on a flat surface). He role-models simple ideals, like selecting a knife just slightly bigger than the item you are trying to cut, or using a board just slightly longer in hypotenuse than your knife's length.

He is calm cool and collected as he cooks. He never panics. He loves what he is doing. He's not worried about getting it wrong. He is not bothered by the slight wobble in any given preparation of any given dish. Of course, this means you shouldn't worry about it either.

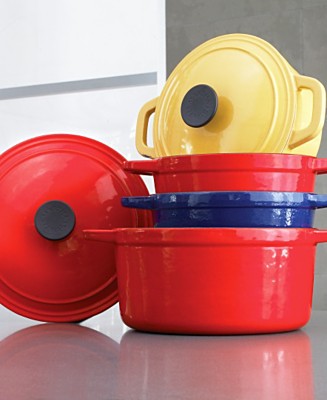
I also like the fact that he isn't afraid to use microwaves, and that he is a fan of French enameled cast iron. So am I.

He is also a dead-ringer for my Uncle Patrico. I mean these two guys look like virtual clones of one another. I'll bet my Uncle could easily sneak into a major cooking event in New York wearing a name tag that said "Jacques Pépin". A lot of people would buy that fake and never even suspect they were tricked. Of course, the Ecuadorian accident vs. French accident would give him away.

Tyler Florence


This is probably my favorite chef. Nobody on the Food Network does a better menu than this guy. I love the older shows where he travels around the globe (mostly to European destinations) to track down the most traditional and authentic recipes, and then do a slight American refry. His original Paella episode in Season 1 was utterly priceless. So was the omelet episode.

The new format for the show is encyclopedia of recipes I am going to put together one day. That Julia and Julia movie is going to be replayed as Tyler and Dave. Sooner or later, I am going to try every recipe in Tyler's book.

Tyler is a traditionalist. I like the fact that he doesn't go too far off the reservation. When he riffs on theme, he usually tries to do so culturally traditional ways. When I have prepared dishes for ethnic guests, I have done so from Tyler's vault, and the guests have usually been stunned that "I got it right". They wanted to know how I learned how to do Swedish Meatballs, or Indian food. Guess where I learned it?

Alton Brown


The arch scientist. The great teacher of organic chemistry principles. The guy who tells you "Why" and not so much "How". Some deride Alton as a geek. If so, I am a geek also. This is my kind of geek scientist.

I am a "Why" guy. How is interesting, but why is better and more important. If you know why, how can always be strategically improved. You also know when people are making mistakes in food prep. How so? Because you know why.

Alton's treatment of the Maillard Reaction was a major moment of revelation for me. The Maillard Reaction is ultra-important, but that was just the key, that wasn't the revelation. Nope, the revelation was that all cooking boils down to a series of chemical reactions. That was when I got my first good look at the whole iceberg. If I ever write a cookbook, it is going to be titled A Series of Chemical Reactions.

Understanding what chemical reaction you are going for, and how it can be screwed up, is utterly crucial to getting your results. For instance, I just put $1,200 in grilling equipment on my balcony this past Sunday. I did so for one specific reason: I realized I was not obtaining sufficient heat from my stove to produce a good and decent Maillard Reaction. I just dumped my aluminum cookware because I realized that just about all caramelization and seasoning processes work best on naked iron.

You won't learn why any of this is true unless you attend chemistry class with Alton. I can't agree with him about Shun knives and Kosher salt, but that doesn't matter.

If you haven't heard Alton's detailed breakdown of how Yeast works, you are just missing out on the finest things in life.

Sunny Anderson


Sunny has contributed two crucial favorites to my food menu: (1) Shepherd's pie and (2) Mac-N-Cheese.

I hate to say this, but Sunny's soul-food Mac-N-Cheese, beats up Tyler's French Mournay sauce approach royally. Frankly, it's not even close. I have to thank Tyler for the Panko bread crumbs, and the bacon garnish, but Sunny's approach is the more flavorful. Everybody seems to take the Mournay approach used by Thomas Jefferson. I think that is a mistake. Try Sunny's approach. It's better.

Sunny does Mac-N-Cheese by preparing a cold sauce with the following dry ingredients: flour, paprika, black peeper, cayenne pepper, mustard powder, sugar, salt. It also has the following wet ingredients: sour cream, heavy-whipping cream, half-n-half. She uses the following cheeses: Sharp cheddar, and Habanero Pepper Jack. She cuts the cheese into cubes rather than shredding it.

Just a few tips about Sunny's approach:
  1. Put some Thyme, Garlic and Savory in that cold sauce.
  2. The Mac-N-Cheese should be cooked in an Emile Henry Flame-Top roasting pan. Spread it out thin. Don't go tall. More surface area means more caramelized brown cheese crust at the top, and more Socorrat at the bottom. Both the crust at the top and at the bottom are crucial to flavor.
  3. 350F is not sufficient to trigger the Maillard reaction. Increase the temperature to 400F-425F. Reduce cooking time to 30-35 minutes. Finish in the broiler for 5-10 minutes.
  4. Cover the top with Panko bread crumbs. Garnish with well-browned bacon or panchetta, which ever you prefer.
  5. You might stuff ripped chunks of day-old bread into the top of the Mac-N-Cheese.
Sunny's Shepherd Pie is totally non-English. It is a soul-food respin on the process, but this is another dramatic improvement, much like her Mac-N-Cheese. She goes off the reservation by adding double-thick tomato paste to the hamburger, adding in onions, garlic, savory herbs to the meat. She develops a lot of flavor there. Instead of simple peas and carrots, which are good, she makes an elaborate vegetable layer including things like egg plant, squash, peppers, carrots, etc.

I made this for the first time about a day or two before my brother showed up unexpectedly for a weekend visit. I had a large glass Pyrex roaster full of the stuff. I had eaten one small corner of the dish the night before. My brother utterly annihilated that Pyrex. It was all gone by Sunday. I hardly had any of it. Ben turned down meals at the Goucho Grill and Mazzarino's Italian Kitchen for more Shepherd's pie. He went wacko over it.

I have to say, I like it too. I make both of these on a regular basis now.

Jamie Oliver

Nobody loves cooking more than Jamie Oliver. If you want to see a guy who loves what he does more than anybody else, watch this guy. You are watching an artist in love with the thing he is painting. Jamie is rejoicing while he is cooking. He's having a good time, and it shows. I think he would rather be cooking than doing just about anything else in the world.

It is fun watching a guy have fun. It is fun watching a guy do his favorite thing in the world. Jacques Pépin signs off by saying "Happy cooking!" to his audience. Jamie is that happy cooking guy. Jamie's roll model is an important one. He shows that cooking is a form of creative recreation and relaxation. You have a good time. You don't approach it with stress. It's like a video game: You are highly concentrated, but you are relaxing and having a good time.

The first time I ever saw Jamie Oliver, I was looking for a video manual on how to make Tagliatelle Bolognese. I had lost my episode of Tyler's Ultimate (it is time to replay that one guys) and I was jonesing for a refresher course. I decided to look at YouTube. Jamie's video came up first.

You may laugh, but I honestly thought I was watching a SNL sketch in which Nigel Tufnel, fictional leader of Spinal Tap, was doing a mock cooking show. Jamie does look like Nigel from Spinal Tap. Then I realized this was no joke. The dude in question had serious skill. He knew what he was doing. In just a bit more than 6 minutes, he gave up the entire approach to making fresh-cut, home-made Tagliatelle.

That was quite a revelation. I had no idea what made Tagliatelle distinct as a type of pasta. I knew after I watched the video. It denotes a hand-made egg pasta which is floured, folded, and cut by hand with a knife. This is not extruded or machine cut stuff. You make little tangly nests of pasta noodles with your hands.

Tyler did the show on the Ultimate Tagliatelle Bolognese, HOWEVER, there remains one key way in which you can improve the recipe. You don't buy the Tagliatelle. You make it yourself, fresh.

Incidentally, I just did that last night. I decided to baptize my grill by doing a grilled Tagliatelle Bolognese last night. The results were pretty sensational. I cut the Tagliatelle myself, just like Jamie did.

Wednesday, June 2, 2010

Kyocera advanced ceramic blades


About a year or two ago, I saw an amazing episode of "How it's Made" regarding the world's greatest knives. They elected Kyocera advanced ceramic blades, and showed us just how they are made.

I was more than stunned. I had no idea that there was any such thing as a ceramic knife. I had no idea Kyocera made knives. I knew them only as the manufacturer of my then-present cell phone. I was amazed that these blades (that looked like white plastic disposable knives) were actually the sharpest things on earth this side of a laser beam. I could not believe steel had been surpassed by another material. It was all stunning.

Kyocera blades are made from cubic zirconia. You may know this substance as fake diamond; the stuff they make fake jewelery out of. Don't let that turn you off. Whilst cubic ziroconia may not fit your cultural prejudices regarding high-quality jewelery, it is an absolutely superb industrial material. Specifically you can make pretty outrageous knives out this stuff.

Cubic zirconia, when refined in a proper manufacturing process, is the second hardest material known to mankind. It is second only to real diamond. You can only sharpen these blades with real diamond. They will cut through steel sharpeners.

You can put an absurdly fine edge on these blades. They are more than a match for surgical scalpels. They are almost a match for the (extremely fragile) cracked obsidian blades ancient man used to use during the stone age. Those remain the sharpest edged tools man has ever used, but they last 10 minutes and they are gone. Kyocera edges last a very, very long time. I have been putting mine into a dish washer for almost 2 years now, and they still cut like straight razors.

There are more things to love about these ceramic blades. They are utterly non-reactive. They never absorb or carry the flavors of the items you cut. A simple wash and wipe and the substance is utterly gone. The pores are just too microscopic for infiltration. Unlike steel blades, no shards or particles will get in your food. Acid and base does nothing to cubic zirconia, unlike steel. This means you get the flavor of your food, and nothing more.

I don't know what it was about that short documentary, but it was pretty overwhelming. I was not that into gourmet cooking at the time. However, I was convinced beyond conviction that these were the greatest knives yet made by man. I had to own some. I grit my teeth, gulped hard, and spent a few hundred dollars on amazon.com.

It didn't take long for me to realize I made the right choice. The blades were pure murder; ungodly sharp right out of the box. The interesting thing is that I have never cut myself with one of these knives. I used to (accidentally) cut myself every now and again with steel blades. I think that is because of the force and effort it took to cut with steel Ronco blades. It takes little effort to slice anything with a Kyocera. I never struggle with anything, ergo there are no thrashing efforts. Everything is now an easy stroke.

With all this in the rear view mirror, I have been stunned that I have never seen any chef on the Food Network work with or advocate ceramic blades. They like big heavy steel blades. Alton Brown strongly endorses Shun, which is an amazing Damascus steel blade made in Japan. Tyler Florence seems to do it all with a single 7 inch Chef's knife from God knows who.

Lately I have been learning why this is so. Kyocera Ceramic blades are unbelievably light. I like this. I am used to it. Master Chef's don't like that. They are trained from day #1 of school to use a fast rocking motion in their prep. This technique is entirely predicated on using the weight of your blade to execute that cut. They like heavy blades. Within reason, they heavier the better.

Heavy blades make it easy to cut things like carrots. I stick carrots in the food processor, or I use a Kyocera mandolin slicer. It is a question of approach. There are different approaches.

Just to see how the other half lives, and to try the amazing Damascus steel Shun makes, I bought Alton Brown's signature weapon. It is a damn nice knife. I can rock with it like crazy. With that said it is not as sharp as my Kyoceras.

Just two days ago, when I was slicing up some pancetta for Bolognese sauce, the Shun got pretty tiresome. As the pancetta warmed, it became harder and harder to cut with the Shun. I could have done it, but I got frustrated. I reached for my Kyocera meat cleaver. The job got done quick. Believe me, that 1/2 pound of pancetta was diced inside 1 minutes.

I think I will get another Shun or two. I want the Ken Onion 7 inch Santuko, and I know where I can get it at a steep discount. I may get the Chef's knife also. That would be the ideal rocker.

To you guys at the Food Network: Give Kyocera a shot. It has been scientifically proven that these are the hardest and sharpest blades.

I bought mine in black.

Thursday, May 27, 2010

My apple pie theory has been confirmed.

I promised to report back to you with results of the Poppy Seed crust. It worked. I completed a 30 minute burner workout on the bike, and had a pretty good sized ache and pain in my left hip and knee. I ate a nice sized slice of my pie. Now I don't have any pain in my hip and knee. The Mu receptors have been blocked. Right now I am pain free. I was a bit spacey there for a minute. I am sure that was the accelerated dose dump.

Bow down to me, Alton. You have met a worthy chemical opponent.

Apple Pie


So last night I took my second swing at the Alton Brown version of the good 'ole American apple pie. The results look good. I don't yet know how they taste. Why is that, you ask? Well let me tell you about it.

The fully-authentic American apple pie is not fast food. I now scoff at the Bullet Express infomericials which seem to indicate that you can whip-up an apple pie quickly. Bullshit! You may get some crust with some apple in it, but this is hardly a classic american apple pie. The real thing takes time. Considerable amounts of time. What does the time table look like?
  1. After whipping up the crust dough, you need to put it in the frige for two hours. I do mine over night in the frige. It turns out much better that way.
  2. You need to peel and slice your 3.5 pounds of apples. This is a laborious process. You can get a partial short-cut by using a good apple slicer which automatically cuts the apple into 12 equal slices, however, this doesn't really save that much labor. Slicing apple is the easiest part anyhow. The apple slicer is mostly used for consistency of thickness, not time savings.
  3. You have to place your apple wedges in a colander, sprinkle 2 or 3 ounces of sugar on them, and allow 1.5 hours for "apple collapse". The sugar basically sucks large amounts of apple juice out of the slices. This juice should be allowed to drain into a mixing bowl... you'll need it later. If you skip this step, the wedges will expand like crazy in the heat of the oven. The result will be the dreaded pie-dome, which is not good eats.
  4. An absolute minimum of 2 hours after start-time, you can begin assembly. Believe me, it will take longer than that. If you are assembling anything short of 3 hours after start-time, you probably skipped a step or did something wrong.
  5. The next step is to roll out your dough. For me, this has been the most challenging portion of the show. I hate wax paper. I haven't owned any in 20 years. Believe me, you need wax paper. Next time, I am buying wax paper. Pie dough is not like pasta dough. It does not hold together well. There isn't much gluten there to hold it together. If you glutenize your flour, you will get tough--not flaky--pie crust. That ain't good eats. The problem is that good pie dough, rips and tears and falls apart under little stress. The answer is rolling in wax paper... that has been flowered... in rice flour... not wheat.
  6. Then you must assemble the ingredient for the filling. Alton Brown recommends your sugared, collapsed apple wedges, apple jelly, apple cider, salt, tapioca, lime juice, more sugar, and the Grains of Paradise. More about that later. No fucking Nutmeg. No fucking cinnamon. No fucking cloves. No fucking Allspice. You may use Caraway as an alternative, but this is not recommended. Toss it all together in another mixing bowl, stick your Pie Bird dead-center, and pack your filling into your pie crusted-tart pan. More about the Pie Bird later. More about the Tart Pan later.
  7. Slap your wax-paper cover of pie crust over the top, poking the Pie Bird's little head out of the middle, seal it good.
  8. You need to reduce the apple juice you got from your "apple collapse" in a sauce pan--or plain pan--down to a jelly glaze. This takes 10 or 15 minutes under low heat. Get out a nice barbecue brush, and brush that glaze onto your pie crust. This sugar will caramelize on your crust, and give you some nice brown flavors.
  9. The first time I did pie, I used my regular gas-oven. I set the temp at 400 degrees, extra-high because my oven sucks, and cooked it for 50 minutes. It didn't work out so well. The whole pie was under-done. My regular oven does not hit or maintain its target temperatures well at all. This is why I bought a NewWave Oven Pro in the first place. Last night, I dropped my loaded tart-pan inside my NuWaveOven Pro for 50 minutes at 90% power. It looks like it worked out extremely well. The crust seems very flaky and I got a very nice browning effect. Remember color = flavor. You want lots of nice brown caramel flavors. I should have known a convection infrared oven would kick-ass in this application. A lot of bakers absolutely demand convection ovens.
  10. Once you do that, you set the pie out to cool for no less than four (4) hours. If you skip this step, the whole frickin' thing will fall apart into rubbish as you slice it. It will still taste good, but you will be eating hot apple cobbler. They call it apple cobbler because to you cobbled it down before it was ready. As Alton says, your patients will be rewarded.
So reckon 3 hours before you can begin assembling. One hour to assemble, if you are fast. One hour to cook. Four hours to cool. We're talking about a 9 hour project to make just one fucking pie. Better make two while you're at it. Now I remember vividly how my grandmother used to get up early on Thanks Giving day and start the pies. I know why she did this now.

I made my pie last night. I let it cool over night. It got more than 4 hours of cooling. It was ready to eat this morning, but I didn't want to slice into it. Apple pie for breakfast just doesn't seem right to me. I want steak and eggs. I put my pie in the frige to cool some more. It's going to be great tonight.

So I deviated from Alton's program in a couple of key ways:
  1. I put some poppy seeds in the pie crust mix. Poppy seeds are good. They add a lot of flavor, and they do contain those narcotic opiod alkaloids known as morphine, codeine, thebaine, and papaverine. That is not a joke. They really do. Old people eat poppy seed baked goods all the time. They do so for because of their arthritis. I have advanced osteo-arthritis in my knees. You don't get much of the good stuff in poppy seeds, but every little bit helps.
  2. I refused to settle for just the Grains of Paradise in my pie. I like a little cinnamon, Allspice and Caraway in my apple pie. I hate cloves. No cloves. I therefore ground up a blend of these spices in my Magic Bullet. It worked like a sonofabitch the first time. The pie was very fragrant, and it had a lot of flavor. I was a bit more conservative with the dosage this time. I wanted subtly. There is a synergistic effect here. Be cautious.
  3. I cannot find Apple Jelly anywhere on the frickin' local market. This really pisses me off. No, Whole Foods does not have it. Trader Joe's doesn't either. Neither does Gelson's. Neither Sur Le Table. Neither does Bristol Farms. If you want Apple Jelly, you can make it yourself. Therefore, I substituted Apple Butter instead. There doesn't appear to be any negative consequences from this substitution. It works fine.
  4. I like a mixture of corn starch and tapioca as my thickening ingredients. Maybe I am just a poor-boy, but I was raised on corn starch, and it tastes better to me. Tapioca is a bit funky.
  5. Of course, the NuWaveOven Pro is not precisely as per the SOP. We'll see how it works out. It looked great.
  6. I did not like the size of the full apple wedges. I cut them in half. A little smaller is a little better. You can pack more weight in there that way.
Otherwise, I did it the Alton Brown way. So now for a few of those key items Alton insisted on, and which I have never seen before:
  1. The tart pan. This is a special pan with a wrinkly outer wall and false bottom. It has to be 10 inches in diameter and 2 inches deep. That is not easy to find. Sur Le Table came close, but no cigar. I had to order a pair of these items through Amazon.com. Both turned out to be different and excellent. One was aluminum and the other was titanium.
  2. A Pie Bird is a ceramic (usually porcelain) little bird with his head stuck high in the air. It looks like something you might hang on a Christmas tree. The correct term in engineering vernacular is a steam vent. It belongs to a bygone era when people used to make everything ornate. I think it is a pretty cool throwback. If you don't use a Pie Bird, steam pressure will build inside your pie, and you will get either a pie dome, or a dripping mess. Sing a song of six-pence. Four and twenty black birds baked in a pie.
  3. Grains of Paradise is a very strange little spice I never heard of before. Shortly after seeing the apple pie episode of Good Eats, I noticed Samuel Adams is brewing a beer with Grains of Paradise. It is also known as Melegueta pepper and Alligator pepper. It looks like pepper and tastes like pepper to me. I got mine from Whole Foods. I think Caraway tastes better. There is something a bit weird about pepper in an apple pie. I am a major fan of heat also. I am currently growing Naga Jolokia and Bhut Jolokia in my hydroponic garden. It doesn't get hotter than that. Even so, I find pepper in my apple pie weird.
About the Pie Crust

For me the most surprising and amazing aspect of the Alton Brown apple pie is the crust formula. Alton gave us the following items:
  1. 12 oz (by weight) white flour.
  2. 1 Tablespoon of sugar
  3. 1 teaspoon of salt
  4. 6 oz (by weight) of unsalted butter (1.5 sticks of Challenge)
  5. 2 oz (by weight) of vegetable shortening (Crisco)
  6. 3 oz of Apple Jack.
No water. No egg. Little gluten. That's the objective. You mix the dry ingrediants in your food processor. I have a KitchenAid which is decent. You add the butter slowly as it blends. You add the vegetable shorting. Finally, you pour in the Apple Jack. Your food processor will turn it into a dough ball.

As noted above, I added some Poppy Seeds.

Just what the hell is Apple Jack? It's not your childhood cereal, that is for sure. It is the original, and most preferred, alcoholic beverage of the founding fathers. George Washington used to brew it. Abe Lincoln used to sell it in his Tavern in Springfield. It doesn't get more American than that.

Apple Jack is basically Apple Brandy. It is mostly ethyl alcohol. Ethyl Alcohol does not combine with wheat protein to form glutens. There is still some water in that Apple Jack, but not much. Apple Jack adds apple flavor to the crust, and makes it light and flaky. This is the secret ingredient, the quintessential element, the missing 5th element of the apple pie.

The 6th Element

I put the 6th element into the crust with the Poppy Seeds. Ethyl alcohol has some interesting interaction effects with Opiates. Some fools crush Vicodin tablets and drink them with Scotch Whiskey. The ethyl alcohol is an accelerator of the hydrocodone. They call this "dose dumping". This puts all of the hydrocodone into your blood stream immediately, triggering a bigger reaction.

I'll tell you what happens when you bake Poppy Seeds in a pie crust with Apple Jack tomorrow. You see, Alton Brown is not the only sonofabitch around here who knows something about chemistry. I am perfectly capable of adding some wrinkles here you just can't and won't believe.

You see! This is how I stay out of trouble. There are no Kevin Ellison stories with me because I stay home and bake apple pie. There are no Sean Payton stories with me, because I am busy baking apple pies. There are no Gloria James Delonte West stories with me, because I am home in the evenings baking apple pie.

Now I just need to invite Eva Mendez and/or Paz Vega over for a slice.

Wednesday, May 19, 2010

Enameled Cast Iron?


Lately, I have been looking into upgrading my cookware. I do a lot of cooking for myself. Pretty soon, I will have to cook all the time. When I have that Gastric Bypass surgery, there will be no more adventures out for eats for yours truly.

The educational courses I have already had warn us to forget about eating out for about a year or so after the surgery. There is no way it will ever work out. You will either have to carry out 80% your food, or you will throw up. In either case, you will be malnourished. You have to watch your micro-nutrients very closely when you have this surgery.

We have been warned they everyone throws up at least once. Sooner or later, your co-workers lure you out to McDonalds for a Happy Meal. Surely you can eat something as small as a child's happy meal, right? Nope. The grease will make you sick immediately. Remember, they bypass the upper intestine where that grease is processed. You will throw up violently, and then the mere smell of McDonald's hamburgers and fries will make you sick.

No more ventures out for food. Consider cooking for the rest of your life. It will workout better for you that way.

Well... if I am going to cook every damn meal, I intend to get the most out of it. I am going to do the gourmet thing. I am watching the Food Network now more than ever. I am mastering at least one new dish per week. This week I am cheating. I'm learning Alton Brown's apple pie.

Next week Paella. The week after that, engagement chicken.

This brings us back to the topic at hand: Enameled Cast Iron. Just what the hell is it? I am sure you all have seen old-fashioned black cast iron pots and pans. These are the ones traditional american settlers used to cook on the Prairie.

Enameled Cast Iron contains the same core black iron pot or pan. The difference is that they coat it with a robust layer of porcelain enamel. We're not talking about just any old enamel either. We're talking about the good stuff; the same material they make Glock handguns out of. The same material dentists use to make the most robust surgically implanted artificial teeth.

Why would anybody coat iron in enamel? First of all, you get the toughest non-stick surface you've ever seen. It's much more robust than Teflon, which is a cheap substitute. Second it is way more non-stick than Teflon. Teflon is easier to clean than Steel or Iron, but it still isn't easy to clean. Enameled Cast Iron usually wipes clean with a plain cloth. I'm not joking. I tried it. It's stupid easy to clean these things. If you hate washing the pots and pans, try this. It will take the surgeons 3 hours to get the smile off your face.

Just think of how easy it is to clean your toilet brilliant white. With a simple spray and a quick wipe, it's clean. Just think of what it is subjected too. This is what porcelain is capable of doing for you. Toilet porcelain is not good quality stuff either. This is cheap porcelain.

Second of all, enameled cast iron works with induction. I am going to have to write a piece about induction cooking soon. Suffice it to say that electrical coils and gas ovens are obsolete. You know that Viking Oven everybody used to want? Forget it. Totally outdated and outmoded.

Induction is a trip. You put you pot or pan on top of an electromagnet cranking waves at up to 1,800 watts. The electromagnet never gets hot. The pot or pan does. The pot or pan is the heating element. The entire pot or the whole pan becomes the heating element. It doesn't have one hotspot. Chefs who try it praise the amazing evenness of the cooking they get out of induction. They usually switch.

Now the problem with using electromagnets to heat metal is that you must use a metal that responds to magnetism. You have two options: Iron and Steel. No bloody Aluminum. No bloody copper. No bloody glass. This is a shame, to a certain degree, because copper has marvelous qualities to recommend it.

Enameled cast iron is iron. It works fine with induction. You'll love it.

There are some other reason to go with enameled cast iron: acid and base. Lime and Lemon are two very important ingredients in a lot of recipes. Oranges and tomatoes are also. All of these pack a corrosive whallop. They will degrade Teflon and Iron. Tobasco and hot sauces will rip these materials to shreds. Stainless steel is mostly immune if it is good quality stuff. Enameled cast iron survives just fine thanks.

For a guy like Tyler Florence, Bobby Flay, or Alton Brown the choice is simple: 18-10 Culinary Stainless Steel. They claim they don't like anything else, although everyone of these guys has at least one enameled cast iron Dutch oven. Every time they have to braise something, the enameled cast iron comes out from under the counter.

Some of the cooks on the Food Network have been making the switch to enameled cast iron lately. Giada DeLaurentis has been using this gear for her latest shows. She has good reason too. This is is really good gear.

So why the hang-up on stainless steel? There are some reasons, good and bad:
  1. Stainless can take pretty extreme heat. This is presuming your recipe requires extreme heat, which is almost never. This also presumes your grill can produce extreme heat, which is almost never.
  2. Alton Brown claims that you cannot make a pan sauce on a non-stick surface. He's mostly talking about Teflon. He's partially talking about Porcelain. You need sticky steel to produce all that good nasty brown stuff that makes a good pan sauce. I will admit: I like a nice pan-sauce, but I am not at all certain it is impossible to do with a porcelain surface.
  3. Stainless is the traditional weapon of choice. A deep bias in favor of Stainless steel is bred into professional cooks who go to cooking schools. They demonstrate this bias every day on the cooking shows. The bias is passed on.
  4. Steel heats faster than iron. Enameled cast iron takes longer to heat than regular iron. This is mostly a thing of the past. If you intend to use induction, this is not much of an issue. Enameled cast iron heats up very fast under induction.
Personally, I have gotten to the point where I have been convinced that enameled cast iron is the way to go. If you are going to get an induction cooktop, or if you have one already: Consider enameled cast iron.

So how did I discover enameled cast iron? Two pathways of research simultaneously converged on enameled cast iron. First, I was looking hard at induction cooktops. Second, I discovered this French brand of enameled cast iron cookware called Le Creuset at Whole Foods.

Le Creuset pots and pans sell for outrageous prices. The tags say $200 and $300 per piece for each one of these things. I wondered just why the hell rich people would be stupid enough to spend that kind of money for colorful cookware. Well, it turns out there are a few reasons. They claim these enameled cast iron pieces are so durable they will last for generations. Your grandkids can use them. Second, they work with induction. Third, they wipe clean with a paper towel. No need for the washing machine.

It turns out there are several more vendors of enameled cast iron out there in the world. There is a little Tennessee company called Lodge that has been in business for over 100 years that does this cookware also. They do it for a fraction of the cost of Le Creuset. They make good stuff also.

So I am going to buy a bunch of Lodge enameled cast iron and help Tennessee to recover from the flood.